



My Backlit Pages
Using the example below, here’s how to apply digital fill-flash to your images.
The original image of a marine naturalist in La Paz, Mexico, was taken in open shade with strong backlighting (see figure 2). It does not show the subject in the foreground adequately. I would like to modify it so that the skin tones are lighter, while leaving the background untouched.
 Figure 2
Making the mask. I examine the Red, Green and Blue channels, looking for the channel that shows the best contrast between the foreground image and the background (see figure 3). In this image, the Blue channel shows a greater difference between the skin tones and the background, so that is the channel I chose to duplicate to build my mask.
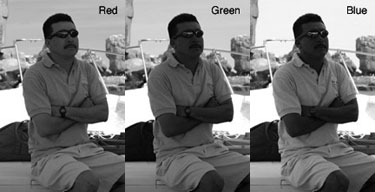 Figure 3
To duplicate a channel, I drag its title to the New Channel icon in the Channels window in Photoshop (see figure 4).
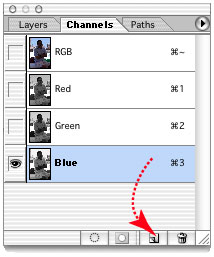 Figure 4
A copy of the Blue channel is generated (see figure 5). I immediately rename the new channel “Mask” so there is no doubt what its purpose is (see figure 6).
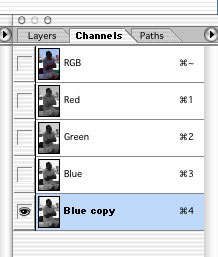 Figure 5
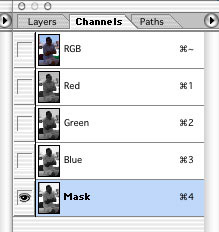 Figure 6
Modifying the levels.Once the new channel is made, I modify it with Levels. This allows me to select the subject, making it as dark as possible, while lightening the background and eliminating most of the tonality there. In this example, the sliders in the Levels control panel are tightly clustered in a group that darkens the subject, and lightens the background effectively (see figure 7).
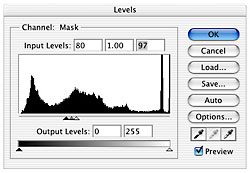 Figure 7
This is the result of the levels adjustments (see figure 8). I then Invert the image (Command/Control-I) to create the negative of the mask image (see figure 9). Photoshop works with masks using the metaphor of film masks: white areas allow an effect to take place, while black areas are treated as opaque, and prevent the effect from taking place.
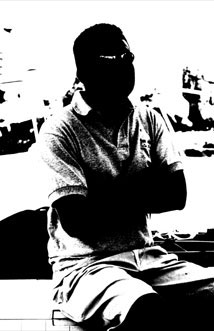 Figure 8
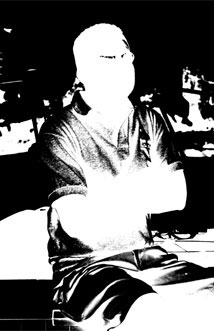 Figure 9
This article was last modified on December 13, 2022
This article was first published on January 7, 2003
Commenting is easier and faster when you're logged in!

Recommended for you
How to Adjust Colors Using Photoshop’s Contextual Task Bar
Learn how to use the Photoshop Adjust Colors feature to make quick, non-destruct...

Using Photoshop’s Generative Fill to Remove Objects
Learn how to simply remove items from an image in Photoshop, without extra conte...
How to Turn a Photo into Graffiti in Photoshop
Create a spray-painted masterpiece in Photoshop with Steve Caplin.