




If you have to crop the edges of one or two images, it’s easy to do it manually, right? Just change the size of the frame, or increase the size of the image inside the frame. But what if you need to crop dozens or hundreds of images — all exactly the same amount?
One common example of this is when you have photos that have a border around them, like this:
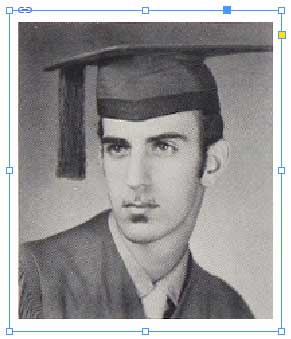
We need to enlarge the image to fit the frame, so that the white edge gets cut out. One way to do this is to choose Object > Fitting > Frame Fitting Options.
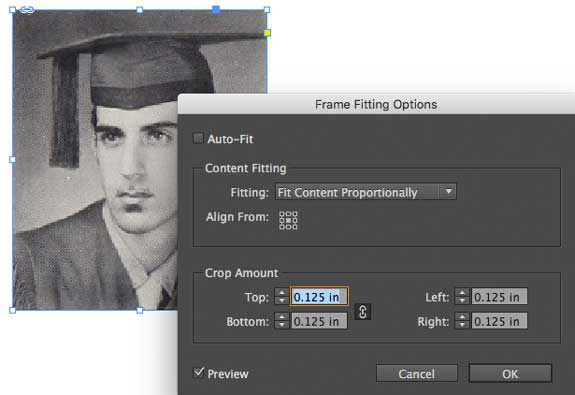
First set the Fitting pop-up menu to Fit Content Proportionally, then set the Align From icon to the center (so that it scales from the center point of the image). Finally, set the Crop Amount to the measurement you want to cut out. In this case, I happen to know that all my images have 1/8-inch too much space around them.
(Note that the measurement is based on the original image, not the size the image appears on your page.)
Of course, you wouldn’t want to use that menu item over and over again… instead, you want to save this as an object style:
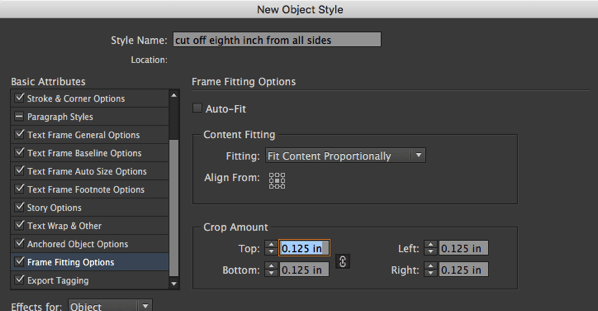
Then you can apply it with a single click each time you need it!
This article was last modified on July 25, 2019
This article was first published on December 5, 2016
Commenting is easier and faster when you're logged in!

Recommended for you

Free Webinar: Animate Your Marketing Graphics with Photoshop
Learn how to create eye-catching animated GIFs, motion graphics, and simple vide...

How to Fix Missing Content Problems in Premiere
Learn what the media warnings in Premiere mean and how to address them
Animate a Waterfall Effect on a PowerPoint Bar Chart
Stephy Hogan is back with another eye-catching animated chart design.